Using Charles Proxy with Xamarin.Android
30 Nov 2021 | Xamarin Xamarin.Android Network dotnetI’ve been debugging some network issues in one of my Apps recently. To help me I acquired the help of the excellent macOS Application Charles Proxy. I needed to see what was sent to and from the servers the App communicates with and also check the contents. One issue though, all the calls are through SSL, so without a little bit of setup, you will not get far checking the contents of the calls.
The information served in this blog post, may also work with Fiddler and mitm-proxy if you prefer those tools.
Charles Proxy has a way to do SSL proxying, which can show you the text contents of SSL requests and responses. You can specify specific sites to include. To get this to work with Xamarin.Android or .NET6 Android, we need to tell the AndroidClientHandler which certificates we trust. In addition to the regular set up specifying Charles to be the proxy in the WiFi Settings.
For some reason using the built in Android functionality specific to setting networkSecurityConfig in the Android manifest and allowing to use trusted user certificates doesn’t work with AndroidClientHandler, so we have to do some manual grunt work.
1. Setting Up Device Proxy
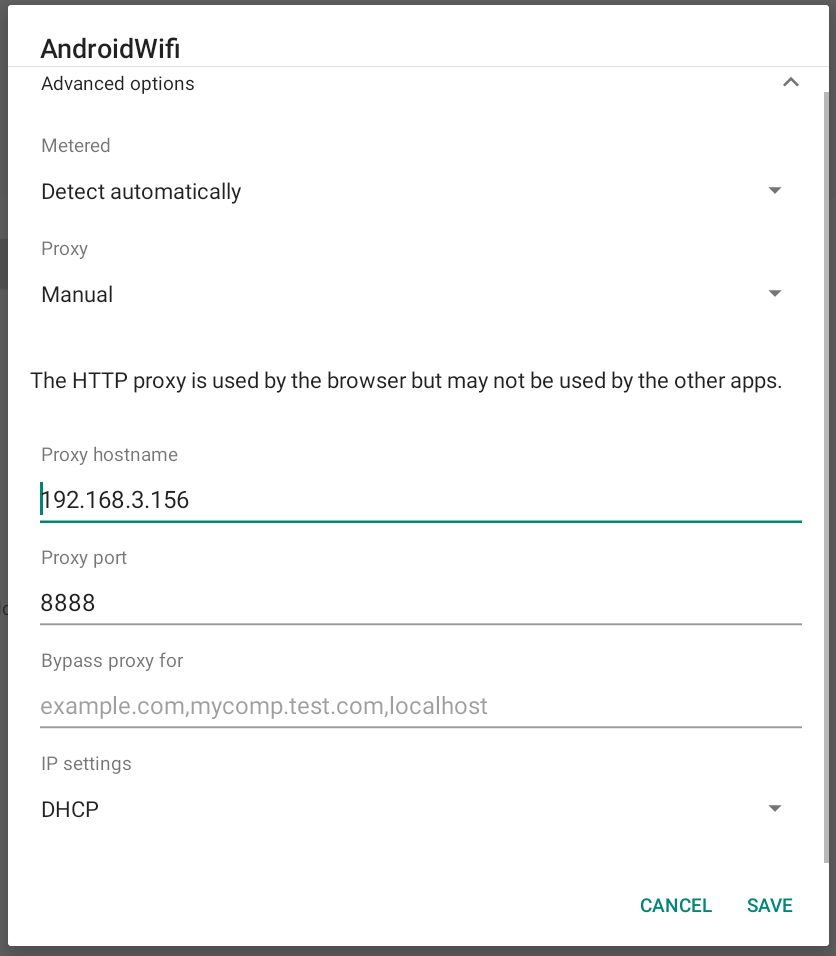
First we need to modify the device settings to point towards Charles Proxy. You can do that through WiFi settings on your device. Go to Settings -> Network & Internet -> Wi-Fi. Press the Gear icon next to the connected network and edit it using the pencil icon.
In the Proxy drop down select Manual
Proxy hostname will be the IP of the machine you are running Charles Proxy on. You can find this using Charles in the Help -> Local IP address menu. Proxy port will be the port defined in Charles Proxy settings, default is 8888
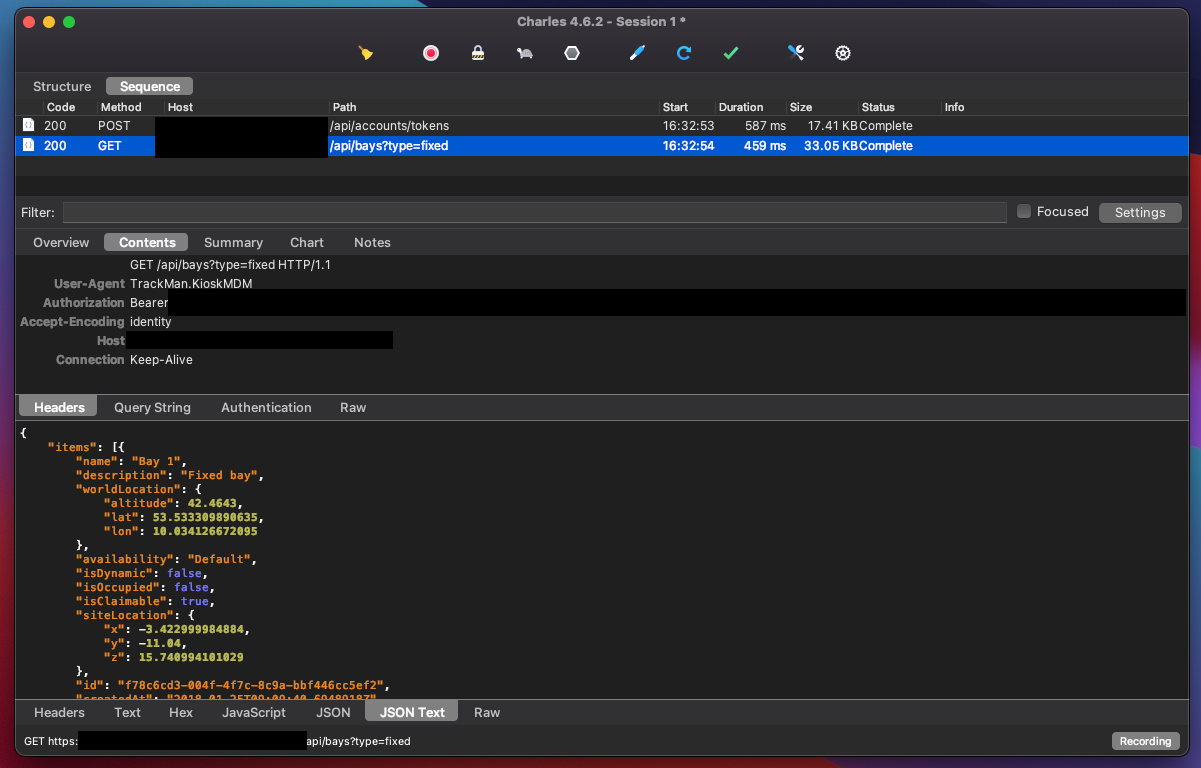
Doing this step, you should start seeing traffic flowing into Charles from your device. You will see that all SSL requests/responses have garbled data. Not something you can read. We will fix that in next step.
You can also verify the proxy works by going to http://chls.pro/ssl in a browser on the device, and it will download the Charles Root Certificate. For this setup, it is optional to install it.
2. Adding Trusted Certificates to AndroidClientHandler
Since AndroidClientHandler doesn’t grab user installed certificates, we need to add them ourselves.
In Charles Proxy go to Help -> SSL Proxying -> Save Charles Root Certificate…. Save it as Binary certificate (.cer).
In your Android project add it to the Assets folder and remember to mark the file Build Action as AndroidAsset.
Now to setting up a AndroidClientHandler with the certificate.
private AndroidClientHandler CreateClientHandler()
{
    CertificateFactory? factory = CertificateFactory.GetInstance("X.509");
    var clientHandler = new AndroidClientHandler();
    if (factory == null)
        return clientHandler;

    try
    {
        using Stream? stream = ApplicationContext?.Assets?.Open("charles-ssl-proxying.cer");
        var cert = (X509Certificate?)factory.GenerateCertificate(stream);

        if (cert != null)
        {
            clientHandler.TrustedCerts ??= new List<Certificate>();
            clientHandler.TrustedCerts.Add(cert);
        }

        return clientHandler;
    }
    catch (Exception e)
    {
        _logger.LogError(e, "Failed to get Charles Certificate");
        throw;
    }
}
Basically what happens here is that we load the charles-ssl-proxying certificate from assets and create a certificate that we add to AndroidClientHandler.TrustedCerts. This is where it expects extra certificates to be added.
Now with this AndroidClientHandler you can create your HttpClient with that handler:
var client = new HttpClient(CreateClientHandler());
In my latest project I started using HttpClientFactory, which allows me to set this handler once and forget about it.
Anyways, when creating requests with HttpClient now, you should be albe to see the data sent and received even when using SSL!
Note: remember to add domains to the SSL Proxy Settings in Proxy -> SSL Proxy Settings in Charles. A good practice is to limit these to the domains you expect and want to debug.


